Manatee Facts- datos curiosos del manatee (1)
10 Curious Manatee Facts That Are Going to Blow Your Mind
03/05/2023
dive travel - viaje de buceo (1)
Dive Travel, How to Prepare Yours?  A Complete Guide
17/05/2023
Show all

Underwater Videos; How to Capture the Most Incredible Ones

A few years ago, I was really insistent on filming my own underwater videos. I mean, REALLY insistent. Some call it a calling, but I didn’t know that yet.

I complained about the underwater videos I had.

If they were unstable and blurry.

If they were green.

If OMG, I get bored just watching them.

If I have to pay for an underwater video in every diving spot, I could buy a GoPro and make all the videos I want.

And so on, until I bought it, tried it, and made a complete mess the first time. The first videos of underwater scenes I made were so bad that I almost cried.

Licking my wounds, even I thought of giving up, but I’m naturally stubborn! So, I trained with my video camera underwater, filmed, filmed, and filmed, got a better underwater video camera, and filmed more…so much so that now I’m a professional videographer and one of the cameramen for Dressel Divers.

So, to prevent you from making the same mistakes I did, and to prove that underwater videos are not only for André Laban (Cousteau’s videographer) and a select few more, today’s article will cover the biggest problems that amateur videographers face and give you a few tips to improve your videos of underwater.

1. The Difficulty of Filming Videos of Underwater

Underwater videos as the surface ones need light, but down there light diminishes and colors fade. To make matters worse, the diving mask makes it difficult to see the underwater video camera’s image and monitoring screen.

Another point to consider is that objects viewed through the goggles and lens appear 25% larger than they actually are, so you have to move back to improve the shot. However, that means more water between the object you want to capture and the lens.

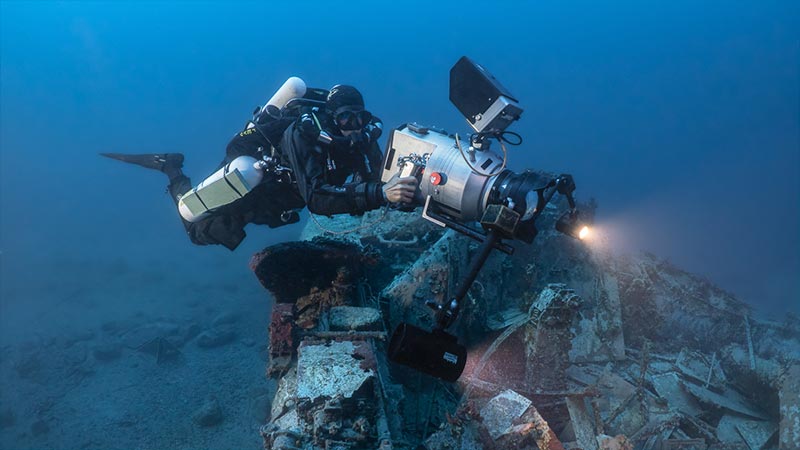
The underwater video camera is a bulky contraption surrounded by gadgets that add extra weight and also affect your trim and buoyancy. You can only carry them with your arms.


2. Usual Mistakes Creating Underwater Videos

If you want to make an underwater video that really stands out, don’t make the same mistakes as many videographers do.

Forget The Underwater Video Lighting

Without artificial light, colors fade underwater, and your videos of underwater scenes can look a bit dull. Also, make sure to have a tray for stability and articulated arms to adjust the lights as needed. Yes, you read that right, 2 lights are ideal, but hey, if you’re a beginner, one light is enough to get started.

Filming Videos of Underwater Scenes Without a Plan

Another mistake is improvising a video without any information about the environment you will film. Take note! Research before you dive. Talk to dive guides or consult a local diving book to know what animals or landscapes you can find. This way, you can configure your equipment with the necessary lenses and accessories for what you want to record and manage your dive time better.

Moving Like a Crazy Person

Creating videos of underwater animals, and moving behind them is another mistake. That just scares the poor creatures and leaves you with a fishtail. Move slowly and wait for them to come to you.

Another of the beginner mistakes in underwater video is shooting long scenes while flapping like there’s no tomorrow. Don’t do that!

The idea is to stop, and focus on framing and what’s worth it. But if you still want to shoot while in motion, slowly use the frog kick and record with the inertia for a few seconds.

There is a foolproof trick: rotate your waist to aim the camera completely to one side, press the record button, and then slowly unwind to the other side. But beware, don’t try to turn your whole body with your fins, or you’ll only make your video shakier than a jelly in an earthquake!

Using A Selfie Stick

Don’t use a selfie stick. Well, use it only if you want to make whoever watches your underwater video feel seasick.

Besides, using a selfie stick is like driving without anyone at the wheel. You don’t know what you’re recording. How can you frame the shot? Believe me, if you want to get a decent underwater video in your life as a scuba diver, do yourself a favor and forget about the stick.

Zooming Too Much

Want to be a pro at underwater video? Pay attention and don’t be a Zoom addict!

Get as close as you can, focus, and record. If you need to get closer, stop recording and reframe with the zoom, or else the camera will go out of focus. Between you and me, I do zooms subtly in post-production.

underwater videos - videos submarinos (3)

Filming The Same Shots Over and Over

Always recording the same shots, using the same camera angles, and boring your audience to death is the same thing. Vary it up!

If you’re recording videos of underwater animals eating (for example) do it with different shots, showing it in the environment with a wide shot and then moving through full, medium, and close-up shots of the head. Finish, for example, focusing on a detail. And if you want to include divers in your underwater videos, record both wide shots and close-ups. Show a variety of shots in your montage and you’ll succeed!

In this underwater video, we can see how my partner begins with an extreme close-up of a nurse shark, clearly showing its breathing. As the footage progresses, there are scene and shot changes of different animals, blending wide shots and medium shots, culminating in an ultra-close-up of the same nurse shark from the beginning, showcasing every detail from its tail to its head.

Filming Macro Shots Handheld

If you’re like me and love recording underwater videos of rare creatures like nudibranchs or crabs, but you have a hand that’s not even good for playing tambourines, I have a solution: a tripod!

Filming macro shots handheld without support is torture for you and the one watching your video because they see a shaky image like a jellyfish. The macro lens, in addition, makes any small movement even more noticeable. If you use a wide-angle lens, it will be practically the same.

Since you can’t place the underwater video camera on any coral, wreck, or rock underwater, as it would damage them, your best option is a tripod.

Plus, you can mount the camera on it and step back, so that the fish can approach on their own.

3. Guide to filming good underwater videos even as a beginner

Make A Script for Your Underwater Video

If you want to be a pro in underwater videography, here’s my best recommendation. Before diving, create a small script with the shots you want to capture.

I’m not talking about preparing “Avatar 2: The Way of Water”, but rather having a clear idea of what you want to film and how to do it.

You’ll avoid wasting time, bring the necessary equipment to the dive, choose better locations, and even incorporate other divers as characters in your underwater video.

It may take you several dives to achieve this, but when you edit the shots, it’ll be much easier to construct the story.

Respect The Law of Movement Recording an Underwater Video

This law consists of leaving some space in front of the subject or object that’s moving so that it doesn’t leave the frame too soon. When you want to end the shot, keep the camera steady and stop filming after it has completely left the frame.

Apply The 180-Degree Rule

There’s an important rule you must follow if you want your video of underwater scenes to look natural (i.e., adapted to human vision) and not blur with movement. Have you ever seen a video where it seems like the image is blurry and jerky? That’s because they ignored the 180-degree rule.

This means that the camera’s shutter speed should be twice the number of frames per second (fps) you’re filming at.

For example, if you’re filming at 24 fps, use a shutter speed of 1/48 to get a smooth image.

Use The Camera’s White Balance

White balance is the function that makes white things appear white in an underwater video. Let’s break it down.

We know that light affects color, and we also know that underwater video light is different from surface light. Ideally, you want the dominant light to be white, which would be equivalent to midday light on the surface or light from a flash. If you’re using good underwater video lighting, you can leave the white balance on manual, but if you’re using natural light, you’ll have to optimize it manually.

To do this, focus on something white and select the mode depending on whether there are more or fewer blue tones, as red tones are barely visible in underwater video.

You Should Know When to Use Lights and Filters

For a wide angle at 45 ft/14 m or less, use a red filter and ambient light. If you want to get bright and clear colors, make sure to have the sun behind you so that the light illuminates the objects well and avoids dark silhouettes.

If you go deeper, turn on the lights when you are filming up close, or accept that the images will come out blue if you record something larger than the illuminated area. Why? Because the red filter often eliminates too much light and deeper down there is already little. The images appear dark and often grainy.

For macro underwater videos, use the lights on, but without the red filter.

Do Not Forget You Will Have to Edit Your Underwater Video

Make sure to review your underwater footage on a large screen to avoid disappointment. If you do it while you’re still on the trip, you can correct mistakes before you get home and it’s too late.

Leave space at the beginning and end of each clip to facilitate editing. Also, don’t forget the music! The soundtrack is key to creating the right atmosphere in your movie. And if you want to give your recording personality, add some sound effects!

Extra Tips for Filming Underwater Videos Like a Pro:

  • Take care of your recording equipment! Perform regular maintenance to avoid problems with the housing and O-ring. We don’t want a possible water entry to ruin our camera or fog up the lens and spoil our videos.
  • Last but not least: don’t get distracted from scuba diving. Yes, making underwater videos is exciting, but you shouldn’t forget the basic rules of scuba. Maintain concentration and don’t let the desire to get good footage make you neglect your safety or that of the underwater environment. A good underwater video NEVER justifies destroying a coral or putting yourself and those around you at risk.

4. Editing Your Underwater Videos

Use The Scissors
You’re diving into the mesmerizing underwater world, capturing stunning visuals with your trusty video underwater camera. But hey, let’s not make it a never-ending saga. Even though the ocean’s wonders are endless, your audience’s attention span isn’t.

Keep your underwater videos short, amusing, and engaging. In the strange case that every frame is amazing, consider splitting your footage into bite-sized underwater videos. This way, you’ll keep your viewers coming back for more aquatic adventures.

Be a Storyteller

Who would’ve thought that beneath the waves lies a realm of untold stories? It’s time to dive deep, not just physically, but narratively too.

Think of your underwater videos as puzzle pieces that, when combined, create a captivating story. Whether it’s a tale of underwater escapades or a glimpse into scuba divers’ enjoyment, stitching together snippets of footage from various times and locations can weave a spellbinding narrative. By embracing the art of storytelling in your underwater videos, you’re inviting fellow dive enthusiasts and filmmakers into an enthralling underwater universe.

Amplify Color Spectacles

Let’s dive into the world of color correction, shall we? Underwater visuals can sometimes appear like they’ve taken a wild trip to the neon realm. Blame it on the underwater lighting dance – it’s a league of its own. Thankfully, with the magic of video editing software, you can dial up the hues to create a vibrant and lively underwater showcase. Enhancing colors in your videos isn’t just a technical tweak, it’s an artistic infusion that brings life and zest to your underwater explorations.

Set the Soundstage

What’s an underwater adventure without an epic soundtrack? The underwater video music isn’t just an add-on; it’s a mood-setter, an emotion conductor, and a scene enhancer. It’s the rhythm of your aquatic visuals. By weaving the right melodies into your videos, you’re giving your audience an immersive experience. From serene symphonies to energetic beats, the underwater world resonates with music just as much as it does with waves. Explore different genres to find the perfect underwater video music – one that syncs with your visuals like they’re dancing to the same tune. Take a look at Cozumel’s video and you will understand what I am saying.

5. Underwater Video Equipment

First, you have to consider your needs and budget.

Underwater Video Cameras

For those who don’t want to spend extra money, it’s okay. There are mobile phones that are perfectly suited for shooting underwater videos with just the purchase of a waterproof case.

There are also compact cameras that are ideal for beginners. They’re small and you can also use wet lenses to take wide-angle or macro photos.

If you’re looking for something easy and portable, action cameras like GoPro are great for shooting underwater videos, but if you’re interested in photography, these cameras may be limited.

For those seeking the best image quality, DSLR underwater video cameras are the perfect choice.

Housings

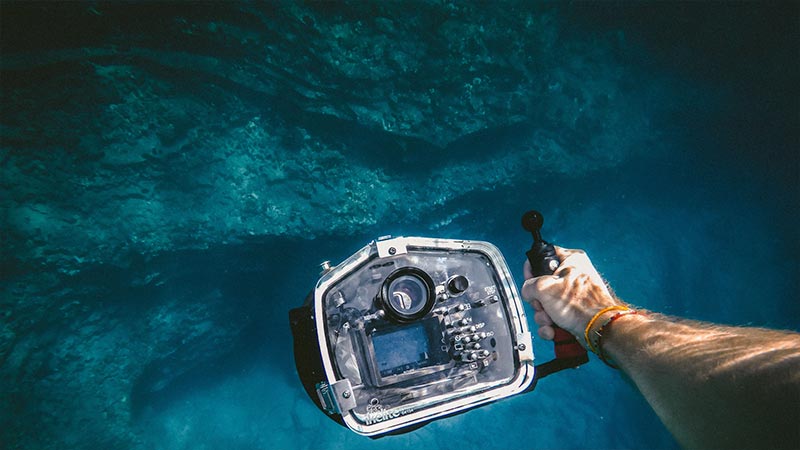
You’ll need housing to protect your camera from water and pressure, so make sure that your underwater video camera brand has a compatible one before you buy it.

There are two types: polycarbonate ones, which are more affordable but less durable, and aluminum ones, which are more expensive but durable and reliable. These are my favorite.

Lenses and Optics

Do you want to photograph tiny animals in underwater macro photography? You need wet close-up lenses, which are magnifying glasses that attach to the housings. There are different types of magnification, +10, +20, +25. The number indicates the amount of magnification the image will have.

Wide-angle lenses combined with domes to eliminate refraction provide a wider field of view. This allows you to take close-up photos of extensive underwater landscapes or large animals that can fit in the frame.

Do you want a curious point of view in underwater macro photography? Try endoscopic or micro-angular lenses. These allow you to capture small things without the background becoming blurred.

By the way, don’t forget about the lens mounting system. 😉

Supports, Arms, and Floats.

The supports or plates are used to transport and hold all the underwater photography equipment. These supports can also have handles for better grip. On the plate, in addition to the camera, the arms that hold the underwater lights that allow us to illuminate the underwater video are placed.

There are two types of arms: flexible and rigid. Flexible arms are constructed of a single piece and are easy to use. On the other hand, rigid arms consist of several sections joined by joints that are tightened and loosened to move them at different angles.

Floats are placed on the arms to compensate for the weight of the equipment. In underwater video, they are important as they will help you achieve smoother and more stable shots.

Visors act as magnifying glasses for the camera’s LCD screen and prevent glare so you can see what you’re filming. They are attached to the housing.

Underwater Video Lighting, Diffusers, and Snoots

Floodlights are ideal for video as their continuous light allows you to see the final result in real-time.

Diffusers are white plastics that are placed on the front of the floodlights and are responsible for diffusing their light, making it more even. In your underwater videos, they will reduce the appearance of suspended particles and reflections.

Snoots are cones that are placed on the front of floodlights to concentrate light on what you want to illuminate. They are great for macro shots, along with the tripod we already discussed.

Underwater video editing software

Lastly, for underwater video editing software, if you don’t want to complicate things, use the basic editing software on your computer, like iMovie or Windows Movie Maker. They are easy to use, but you won’t be able to do much with them. GoPro Studio is an excellent (and free) solution. For the more advanced users, we have paid programs like Adobe Premier Pro or Final Cut, among others.

In summary, if you want to create the best underwater videos, you need to leave bad habits, follow the proven tips I’ve given and have good equipment, in that order. Remember, it’s not the machine that makes great underwater videos, it’s you.

So, are you ready to make underwater videos with Dressel Divers in the Caribbean? Write us.